If you use your shed as a workspace, studio, or simply as a place to relax and unwind, the last thing you want is to be constantly interrupted by external noise. Whether it’s the sound of traffic, construction, or simply your neighbors’ voices, unwanted noise can be a major distraction and make it difficult to concentrate or relax. One way to address this problem is by soundproofing your shed. In this article, we’ll provide a detailed guide on how to soundproof a shed, including tips on choosing the right materials, installing them effectively, and maintaining the soundproofing over time.
Determine the type of noise you want to block out
The first step in soundproofing your shed is to identify the source of the noise you want to block out. This will help you determine the type of soundproofing materials and techniques that will be most effective. There are two main types of noise to consider:
External noise: This includes any noise coming from outside your shed, such as traffic, construction, or neighbors.
Internal noise: This includes any noise generated within the shed, such as tools, music, or voices.
Once you have identified the type of noise you want to block out, it’s important to determine the frequency and intensity of the noise. This will help you choose the appropriate materials and techniques to effectively block out the noise.
Assess the current state of your shed
Before you begin soundproofing your shed, it’s important to assess its current state. This will help you determine what, if any, soundproofing materials or techniques are already in place, as well as any areas that may need additional attention.
Check for any existing insulation or soundproofing materials. Depending on the age and construction of your shed, it may already have some form of insulation or soundproofing materials installed. This could include materials like fiberglass insulation, foam panels, or mass-loaded vinyl.
Evaluate the thickness and density of the walls, ceiling, and floor. The thickness and density of these surfaces can have a significant impact on the effectiveness of your soundproofing efforts. Thicker and denser materials are generally more effective at blocking out noise, so if your shed has thin or low-density walls, ceiling, or floor, you may need to invest in additional materials or techniques.
Look for any gaps, cracks, or openings that could allow sound to enter or escape. Gaps, cracks, and openings are one of the main sources of sound leakage in a shed, so it’s important to seal them up as part of your soundproofing efforts. Pay special attention to areas around windows, doors, and other openings, as these are typically the most vulnerable.
Choose the appropriate soundproofing materials
Once you have a good understanding of the current state of your shed and the type of noise you want to block out, you can start choosing the appropriate soundproofing materials. There are many different materials to choose from, each with their own unique properties and benefits. Some of the most commonly used soundproofing materials include:
Mass-loaded vinyl (MLV): MLV is a dense, flexible material that is commonly used to block out noise. It is typically installed on walls, ceilings, and floors, and can be effective at blocking out both external and internal noise.
Foam panels: Foam panels are lightweight and easy to install, making them a popular choice for soundproofing. They are typically installed on walls and ceilings, and can be effective at blocking out low to mid-frequency noise.
Acoustical sealant: Acoustical sealant is a specialized type of sealant that is designed to block out noise by sealing gaps and cracks in walls, ceilings, and floors. It is typically used in conjunction with other soundproofing materials, and is particularly effective at sealing gaps around windows, doors, and other openings.
Soundproof drywall: Soundproof drywall is a specialized type of drywall that is designed to block out noise. It is typically thicker and denser than standard drywall, and is often used in conjunction with other soundproofing materials.
Soundproofing paint: Soundproofing paint is a specialized type of paint that is designed to block out noise. It is typically applied to walls and ceilings, and can be effective at blocking out low to mid-frequency noise.
When choosing soundproofing materials, it’s important to consider the type of noise you are trying to block out, as well as the size and layout of your shed. You may need to use a combination of different materials to effectively block out the noise, and you may need to install more materials in areas that are more prone to sound leakage.
Install the soundproofing materials
Once you have chosen the appropriate soundproofing materials, it’s time to start installing them. Here are the general steps to follow:
Begin by sealing any gaps, cracks, or openings in the walls, ceiling, and floor. Use acoustical sealant or other sealing materials to fill in any gaps or cracks, paying special attention to areas around windows, doors, and other openings.
Next, add the chosen soundproofing materials to the walls, ceiling, and floor. Follow the manufacturer’s instructions for installation, and use adhesive, nails, or screws to secure the materials in place.
If you are using multiple layers of soundproofing materials, be sure to install them in the correct order. For example, you may want to start with a layer of MLV, followed by foam panels, and then a layer of soundproof drywall.
Test the effectiveness of the soundproofing
Once the materials are installed, it’s important to test the soundproofing to ensure it is effective. To do this, make noise inside the shed and listen for any sound leakage. If you can hear the noise outside the shed, you may need to make adjustments to the materials or their placement. Continue testing and adjusting until you are satisfied with the level of soundproofing.
Maintain the soundproofing over time
Soundproofing materials can wear out over time, so it’s important to periodically check them for any damage or wear and tear. If you notice any damage, repair or replace the materials as needed to ensure the soundproofing remains effective.
Optional additional measures
If the noise is particularly loud or persistent, you may want to consider additional measures to further soundproof your shed. These could include:
Adding a second layer of soundproofing materials to the walls, ceiling, and floor: A second layer of soundproofing materials can provide additional noise-blocking capabilities, especially if the first layer is not sufficient.
Installing soundproof windows and doors: Soundproof windows and doors can be an effective way to block out external noise. They typically have thick, dense frames and special glazing that is designed to block out noise.
Building a soundproof room within the shed: If your shed is large enough, you may want to consider building a separate soundproof room within the shed. This can be an effective way to create a completely quiet and peaceful space, and is especially useful for music studios or other noise-sensitive applications.
Adding sound-absorbing materials, such as carpets or curtains, to the interior of the shed: Sound-absorbing materials can help to reduce echo and reverberation within the shed, which can make it feel more comfortable and reduce the overall level of noise.
Consider the cost and time investment
Soundproofing a shed can be a time-consuming and potentially costly project, depending on the materials and techniques you choose to use. Be sure to carefully consider the cost and time investment before beginning the project, and choose materials and techniques that are appropriate for your budget and schedule.
Follow all safety guidelines
Be sure to follow all safety guidelines when working with soundproofing materials, including wearing protective gear and following the manufacturer’s instructions for handling and installation. Some materials, such as MLV and foam panels, may produce harmful dust or fumes when cut or handled, so be sure to take proper precautions.
Enjoy your newly soundproofed shed
Once the project is complete, you can enjoy your newly soundproofed shed in peace and quiet, free from external noise distractions. Whether you use it as a workspace, studio, or simply as a place to relax, a soundproof shed can provide a quiet and peaceful environment that is perfect for any activity.
Consider hiring a professional
If you are unsure about how to properly soundproof your shed, or if you do not feel comfortable tackling the project on your own, you may want to consider hiring a professional to do the work for you. A professional contractor will have the necessary skills, tools, and experience to complete the project efficiently and effectively.
Research local ordinances and regulations
Before beginning any construction or modification projects, be sure to research and adhere to any local ordinances or regulations that may apply to your shed. This could include obtaining any necessary permits or following specific guidelines for soundproofing structures.
Consider the overall aesthetic of your shed
While soundproofing is an important consideration, you may also want to consider the overall aesthetic of your shed when choosing materials and techniques. You may want to choose materials that blend in with the exterior of your shed, or that complement the overall design of the structure.
Think about future needs
As you plan your soundproofing project, consider any future needs you may have for your shed. For example, if you plan to use the shed as a workshop or studio, you may want to invest in more robust soundproofing materials that can withstand the added noise and activity. On the other hand, if you only plan to use the shed for occasional relaxation or storage, you may be able to get by with less intensive soundproofing efforts.
Additional tips for soundproofing a shed
Here are some additional tips to keep in mind as you soundproof your shed:
Use multiple layers of soundproofing materials for maximum effectiveness: Using multiple layers of soundproofing materials can provide added protection against noise, especially if the first layer is not sufficient.
Pay special attention to sealing gaps and cracks around windows, doors, and other openings: Gaps and cracks are one of the main sources of sound leakage, so it’s important to seal them up as thoroughly as possible.
Consider adding weatherstripping or door sweeps to seal gaps around doors: Weatherstripping and door sweeps can help to seal gaps around doors and prevent noise from entering or escaping.
Install foam tape or door sweeps under doors to seal gaps at the bottom: Gaps at the bottom of doors can be a major source of sound leakage, so be sure to seal them up with foam tape or door sweeps.
Use heavy curtains or blinds to block out external noise: Curtains and blinds can help to block out external noise, especially if they are thick and heavy.
Invest in a high-quality door with a solid core: A high-quality door with a solid core can be an effective way to block out noise. Look for doors with thick, dense frames and special glazing designed to block out noise.
Use thick, heavy rugs or carpets to absorb sound within the shed: Rugs and carpets can help to absorb sound within the shed, which can make it feel more comfortable and reduce the overall level of noise.
Consider adding a white noise machine or music to help mask external noise: A white noise machine or music can help to mask external noise, making it less noticeable and easier to ignore.
Conclusion
Soundproofing a shed can be a challenging but rewarding project that can greatly improve the quality of your shed as a space for work, relaxation, or other activities. By following the steps outlined above, you can effectively block out external noise and create a peaceful, quiet environment within your shed. Whether you choose to tackle the project on your own or hire a professional, the benefits of a soundproofed shed are well worth the time and effort.
As a musician, having a dedicated space to practice and play your instruments is essential. However, if you have a drum set, you may find that the noise levels in your practice space can be a source of frustration for you and your neighbors. This is where soundproofing comes in. Soundproofing is the process of reducing the amount of sound that passes through a wall, ceiling, floor, or other surface. In this article, we will go over how to soundproof a drum room to create a peaceful and comfortable space for both you and those around you.
Soundproofing a drum room can be a challenging task, especially if you’re working with an existing space that has already been built. However, with the right tools and materials, it is possible to achieve a high level of soundproofing that will significantly reduce the noise levels in your drum room.
There are several factors to consider when soundproofing a drum room, including the size and layout of the space, the type of drum set being used, and the level of sound absorption and insulation needed. In this article, we’ll take a look at some of the key steps involved in soundproofing a drum room, along with some tips and tricks to help you achieve the best possible results.
Introduction
Before we get into the specific steps of soundproofing a drum room, it’s important to understand what soundproofing is and why it’s important. Soundproofing is the process of reducing the amount of sound that passes through a wall, ceiling, floor, or other surface. It is often used to reduce the noise levels in a space, whether it be to create a more peaceful living environment or to reduce the amount of sound that escapes a space, such as a drum room.
Why is soundproofing a drum room important? For one, it can help reduce the amount of noise that escapes the room and disturbs your neighbors. This is especially important if you live in an apartment or in close proximity to other homes. In addition, soundproofing your drum room can create a more comfortable and enjoyable space for you to practice and play. Without proper soundproofing, the noise levels in your drum room may be too loud for you to focus or even hear yourself play.
Step 1: Assess the Space, Materials and Determine Your Goals
Before you start any soundproofing work, it’s important to assess the space and determine your goals. This will help you decide on the most appropriate materials and techniques to use.
First, consider the size of the drum room. Larger spaces will typically require more insulation and sound absorption materials to effectively reduce the noise levels. Similarly, the layout of the room can also impact the effectiveness of your soundproofing efforts. For example, if the drum room has a high ceiling or a lot of open space, it will be more difficult to soundproof than a smaller, more enclosed space. Next, consider the type of drum set you’re using. Different drum sets produce different levels of noise, so it’s important to choose materials that are suitable for your specific needs. For example, if you’re using a particularly loud drum set, you may need to use thicker, more dense materials to effectively soundproof the space.
There are many different materials and tools that can be used for soundproofing a drum room. Some common materials used in soundproofing include mass-loaded vinyl, fiberglass insulation, soundproofing drywall or soundboard, and weatherstripping. It’s important to choose materials that are appropriate for your specific needs and budget.
When selecting materials and tools for soundproofing, there are a few factors to consider. The first is the type of noise you are trying to reduce. Different materials are more effective at reducing certain frequencies of noise than others. For example, mass-loaded vinyl is effective at reducing low frequency noise, such as the bass drums and toms on a drum set. Fiberglass insulation is also effective at reducing low frequency noise, as well as mid-range frequencies. Soundproofing drywall or soundboard can help reduce both low and high frequency noise.
In addition to the type of noise you are trying to reduce, you should also consider the type of surfaces you are working with. Some materials may be more effective on certain surfaces than others. For example, soundproofing drywall may be more effective on walls than on ceilings. It’s important to choose materials that are appropriate for the surfaces you are working with.
You should also consider the cost and availability of the materials and tools you are considering. While some materials may be more effective at reducing noise levels, they may also be more expensive or difficult to obtain. It’s important to find a balance between effectiveness and cost when selecting materials and tools for soundproofing.
Finally, consider your goals for soundproofing the drum room. Are you looking to simply reduce the noise levels in the room, or do you need to completely eliminate all sound from the space? The answer to this question will help you determine the level of soundproofing you need to achieve.
Step 2: Identify Potential Noise Leaks
Before you can start soundproofing your drum room, you need to identify any potential noise leaks. These are areas where sound can escape from the room, such as gaps around doors and windows, or openings in the walls and ceiling.
To identify potential noise leaks, you can use a simple trick: light a candle and hold it near any potential openings in the room. If the flame flickers or is blown out, then there is likely a leak in that area. Once you have identified all the potential noise leaks in the room, you can start sealing them up to reduce the amount of sound that escapes from the space.
Step 3: Install Sound Absorption Materials
Sound absorption materials are an essential component of any drum room soundproofing project. These materials are designed to absorb sound waves as they pass through the air, reducing the overall noise levels in the room.
There are several different types of sound absorption materials to choose from, including fiberglass, foam, and mineral wool. Each type of material has its own unique properties and benefits, so it’s important to choose the one that best meets your needs.
To install sound absorption materials, you can use adhesive backing to attach them to the walls, ceiling, and floor of the drum room. Alternatively, you can use special mounting brackets or clips to hold the materials in place.
Step 4: Install Sound Insulation Materials
In addition to sound absorption materials, you may also need to install sound insulation materials in your drum room. These materials are designed to block sound waves from passing through solid surfaces, such as walls, ceilings, and floors.
There are several types of sound insulation materials to choose from, including mass-loaded vinyl, foam board insulation, and mineral wool insulation. Each type of material has its own unique properties and benefits, so it’s important to choose the one that best meets your needs.
To install sound insulation materials, you can either attach them directly to the walls, ceiling, and floor using adhesive backing or mounting brackets, or you can use them to create a separate soundproofing layer between the drum room and the rest of the building. For example, you could install sound insulation materials between the drum room and the adjacent walls, or between the drum room and the floor above or below.
Step 5: Add Soundproofing Door and Window Seals
Doors and windows are common sources of noise leaks in drum rooms, as they allow sound to escape from the space. To reduce the amount of sound that escapes through these openings, you’ll need to install soundproofing door and window seals.
There are several types of soundproofing seals to choose from, including weatherstripping, door sweeps, and window plugs. These seals are designed to create a tight seal around the edges of doors and windows, preventing sound waves from passing through the gaps.
To install soundproofing seals, you’ll need to measure the dimensions of your doors and windows and cut the seals to size. Then, you can attach the seals to the edges of the doors and windows using adhesive backing or mounting brackets.
Step 6: Add Soundproofing Wall Panels
In addition to sound absorption and insulation materials, you may also want to consider adding soundproofing wall panels to your drum room. These panels are designed to absorb and block sound waves, effectively reducing the overall noise levels in the room.
There are several types of soundproofing wall panels to choose from, including foam panels, wood panels, and fabric-wrapped panels. To install these panels, you can either attach them directly to the walls using adhesive backing or mounting brackets, or you can create a separate soundproofing layer between the drum room and the rest of the building.
Soundproofing the floor
While soundproofing the walls and ceiling is important, don’t forget about the floor! Sound can also transmit through the floor, so it’s important to address this area as well.
One option is to add rugs or mats to the floor to help absorb sound. Thick, padded rugs or mats can be effective at reducing the amount of sound that is transmitted through the floor. Another option is to install soundproofing underlayment or rubber mats. These materials are designed specifically for soundproofing and can be installed under your existing flooring to help reduce sound transmission.
If you want to go a step further, you can also lay down soundproofing tiles or flooring. These materials are designed specifically for soundproofing and can be installed in the same way as traditional tiles or flooring.
Step 7: Consider Other Soundproofing Techniques
In addition to the steps outlined above, there are several other soundproofing techniques you can use to further reduce the noise levels in your drum room. These techniques include:
Using soundproofing curtains or drapes: These can be hung on the walls and windows of the drum room to absorb and block sound waves.
Adding soundproofing rugs and carpets: These can be placed on the floor of the drum room to absorb sound waves and reduce the overall noise levels.
Installing soundproofing doors: Special soundproofing doors are available that are designed to block sound waves and reduce the overall noise levels in the room.
Using soundproofing window treatments: These can be installed on the windows of the drum room to block and absorb sound waves.
Step 8: Soundproofing the drum set itself
While soundproofing the room is important, don’t forget about the drum set itself! There are several ways you can soundproof the drum set to further reduce noise levels in your drum room.
One option is to add soundproofing pads or blankets to the drum set. These materials are designed to absorb sound and can be placed on the drum heads or on the drum shells themselves. Drum silencers or mufflers can also be used to reduce the amount of sound that is produced by the drum set. These devices are placed on the drum heads and help dampen the sound.
Another option is to enclose the drum set in a soundproof booth or enclosure. These structures are designed specifically for soundproofing and can be effective at reducing the amount of sound that is produced by the drum set.
Conclusion
Once you have finished soundproofing your drum room, it’s important to test the effectiveness of the soundproofing. This can be done by measuring the decibel level of the noise in the room before and after the soundproofing is complete. This will help you determine if additional measures are necessary.
In addition to testing the effectiveness of the soundproofing, it’s also important to maintain the soundproofing materials over time. This could involve cleaning or replacing materials as needed to ensure that they continue to be effective. Finally, if you find that the soundproofing measures you have taken are not sufficient, you may need to consider adding additional measures. This could include adding more insulation or soundproofing drywall, or installing additional soundproofing materials in the doors and windows.
Soundproofing a drum room can be a challenging task, but with the right tools and materials, it is possible to significantly reduce the noise levels in the space. By following the steps outlined above, you can create a drum room that is both comfortable and quiet, allowing you to play to your heart’s content without disturbing others in the building or the surrounding neighborhood.
Soundproofing a dog crate can be a useful way to create a peaceful environment for your furry friend. Whether your dog tends to bark excessively or you live in a noisy environment, soundproofing the crate can help to reduce noise and create a more comfortable and relaxing space for your dog. In this article, we will explore different methods for soundproofing a dog crate, including the use of soundproofing materials, selecting the right location for the crate, and using white noise and crate covers. We will also discuss the importance of crate size and provide tips for maintaining a soundproofed crate.
Materials for soundproofing a dog crate:
One of the most effective ways to reduce noise in a dog crate is by using soundproofing materials. These materials work by absorbing or blocking sound waves, creating a barrier that helps to reduce the amount of noise that enters the crate. Some options for soundproofing materials include:
Foam mats or pads: These materials are made of a soft, spongy material that absorbs sound waves and reduces the amount of noise that is transmitted through the crate. They are easy to cut and shape to fit the size and shape of your crate, and they can be placed on the walls, floor, and ceiling of the crate to create a soundproof barrier. Foam mats and pads are also relatively inexpensive and easy to find, making them a popular choice for soundproofing a dog crate.
Rubber mats: Rubber mats are another option for soundproofing a dog crate. They are made of a dense, flexible material that absorbs sound and helps to reduce the amount of noise that is transmitted through the crate. Rubber mats can be placed on the floor of the crate and can be easily removed for cleaning. One of the benefits of using rubber mats for soundproofing is that they are durable and long-lasting, making them a good investment.
Soundproof blankets or curtains: Soundproof blankets and curtains are made of thick, heavy material that is designed to absorb sound waves. They can be hung on the walls or ceiling of the crate to create a soundproof barrier, or they can be placed over the crate to create a cover. Soundproof blankets and curtains can be a bit more expensive than other soundproofing materials, but they are effective at reducing noise and can be easily removed for cleaning or when you want to give your dog access to the crate.
Acoustic panels: Acoustic panels are specifically designed to absorb sound waves and reduce noise levels. They are typically made of a lightweight, porous material that absorbs sound waves and helps to reduce echo and reverberation. Acoustic panels can be placed on the walls, ceiling, or floor of the crate to create a soundproof barrier. While they may be more expensive than other soundproofing materials, they can be an effective option for reducing noise in a dog crate.
When choosing soundproofing materials for your dog crate, it is important to consider the size and shape of the crate, as well as your budget and personal preferences. It may be helpful to try out a few different materials to see which one works best for your needs.
Choosing the right location for the crate:
The location of your dog’s crate can also play a role in how much noise it produces. If possible, try to place the crate in a quiet location, such as a room with thick walls or a location that is far from sources of noise, such as a busy street or construction site. This can help to reduce the amount of external noise that enters the crate and create a more peaceful environment for your dog.
When selecting a location for the crate, it is also important to consider your dog’s needs and preferences. If your dog is prone to anxiety or separation anxiety, it may be helpful to place the crate in a location where they can still see and interact with you, such as in a room where you spend a lot of time. This can help to reduce anxiety and make your dog feel more secure.
On the other hand, if your dog is prone to barking or whining when they see or hear people or animals outside, it may be helpful to place the crate in a location that is less visible or less exposed to external stimuli. This can help to reduce the amount of stimulation your dog receives and create a more peaceful environment.
Using white noise machines:
A white noise machine is a device that produces a consistent, low-level noise that can help to mask other sounds and create a peaceful environment for your dog. There are many types of white noise machines available, including portable devices that can be placed inside the crate, or larger machines that can be placed in a nearby room. The use of a white noise machine can be particularly helpful for dogs that are sensitive to sudden noises or for those who are prone to barking in response to external sounds.
White noise can help to create a soothing and calming atmosphere for your dog, and it can be particularly useful for dogs who are anxious or who have trouble sleeping. Some white noise machines even offer a variety of calming sounds, such as ocean waves or rain, which can be helpful for dogs who are sensitive to certain types of noise.
When using a white noise machine in a dog crate, it is important to choose a machine that is the right size and volume for your needs. Some machines are designed to be used in a bedroom or other
Crate covers:
Crate covers are another effective way to reduce noise in a dog crate. These covers are designed to fit over the crate and create a barrier that absorbs sound and reduces the amount of noise that enters the crate. Crate covers are available in a variety of sizes and styles and can be made of a variety of materials, including thick fabric or canvas. They can be easily removed for cleaning or when you want to give your dog access to the crate.
Crate covers can be particularly helpful for dogs who are sensitive to light or who need a dark, quiet space to rest and sleep. They can also be useful for dogs who are anxious or who have trouble sleeping, as they can create a sense of security and privacy.
When selecting a crate cover, it is important to choose one that is the right size and style for your crate. Measure your crate carefully to ensure that the cover fits properly and covers all of the sides and top of the crate. It is also important to consider the material of the cover. Fabric covers may be more comfortable for your dog, but they may not be as effective at reducing noise as covers made of other materials, such as canvas or plastic.
Crate size:
The size of the crate can also play a role in how much noise it produces. Larger crates may be less prone to noise than smaller ones, as there is more space for sound waves to dissipate. If you are considering purchasing a new crate, it may be helpful to choose a larger size to help reduce noise.
It is also important to consider the size of the crate in relation to your dog’s needs. Choose a crate that is large enough for your dog to stand up, turn around, and lie down comfortably, but not so large that it is difficult to heat or cool. A crate that is too small can be uncomfortable and restrictive for your dog, while a crate that is too large can be difficult to heat or cool and may not provide the sense of security and privacy that your dog needs.
Maintaining a soundproofed crate:
To maintain the effectiveness of your soundproofed crate, it is important to regularly clean and maintain the materials you are using. Foam mats and pads may need to be replaced periodically, as they can become compressed over time and lose their effectiveness. Rubber mats should be cleaned regularly to remove dirt and debris, and soundproof blankets and curtains should be laundered or dry cleaned as needed. It is also important to check the crate for any damage or wear and tear, as this can affect the crate’s ability to reduce noise.
If you notice that the crate is no longer as effective at reducing noise as it was previously, it may be time to replace or repair any damaged or worn soundproofing materials. By regularly maintaining the crate, you can help to ensure that it continues to be an effective and peaceful space for your dog.
Conclusion:
Soundproofing a dog crate can be a useful way to reduce noise and create a peaceful environment for your dog. By using soundproofing materials, selecting the right location for the crate, and incorporating white noise and crate covers, you can help to create a comfortable and quiet space for your furry friend. Don’t forget to consider the size of the crate and regularly maintain the soundproofing materials to ensure the crate continues to be effective at reducing noise. With a little effort and planning, you can create a soundproofed crate that will help your dog feel more relaxed and comfortable.
The majority of us find that our bedrooms are the finest spaces for rest, relaxation, and noise cancellation. You will undoubtedly feel more relaxed if your bedroom is soundproof. Therefore, choosing the appropriate soundproofing system is crucial while building or remodeling your room. You can keep undesirable noises out of your bedroom in a number of ways.
Why Soundproof a Bedroom?
If you’re unsure about how soundproofing could help you, we can assure you there are countless benefits. Whether you like them or not, you have no control over the noise your neighbors choose to make. You might find yourself putting earplugs in your ears during restless nights due to loud parties or music. You will experience the calm you deserve when you soundproof your bedroom. By soundproofing your bedroom, you can enjoy your home without drawing unwanted attention to it. You can enjoy all of your noises at your level of comfort, regardless of whether you have a passion for loud music or want some quiet time to practice your guitar.
Controlling and reducing loud noises that enter and leave your room is the main goal of soundproofing your bedroom. Once more, it will encourage privacy and guarantee that neither your neighbors nor other members of your household will overhear your private chats. Unquestionably, soundproofing your room enhances your health and safety while boosting your quality of life and sleep. Even while you may consider too much noise to be an irritation, it can negatively impact your physical, mental, and emotional well-being.
Additionally, adding density to your home’s construction will boost heat retention in the space while soundproofing it. You will eventually notice a decrease in your gas and electric costs, which will result in long-term financial savings.
How To Soundproof A Bedroom?
You can use soundproofing materials on the walls, around the doors, and underneath the flooring to soundproof your bedroom. You may assure a calm bedroom in a variety of ways; continue reading to learn more about each one.
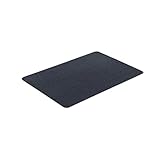
Thick Carpets or Rugs
Noise reduction will be helped by appropriate flooring. One of the easiest and best ways to soundproof a bedroom is to install thick carpets and rugs. The contemporary carpet or rug will function by isolating the noise made by furniture sliding and footfalls.
Even while utilizing the best area rugs on the areas of the floor you use the most will work just as well, you may also choose thick wall-to-wall carpeting. But let’s say you already have a less dense carpet or rug. If so, you might also think about replacing them with thicker carpeting or installing soundproofing underlayment to improve noise absorption.
Consider laying soundproofing mats or rugs over one another to get your desired look while also absorbing sound if a thick carpet is not a good option. For instance, covering a sisal rug with a geometric flatweave rug looks gorgeous and reduces noise.
Acoustic Windows
Installing acoustic windows also works wonders for sound absorption. To absorb sound and vibration, acoustic glass is made of laminated glass, glass panes, and a bonded layer. The thickness of the glass panes can vary depending on the quantity of sound absorption you require, thus as the thickness of the glass rises, so will the reduction in interior noise levels. A professional should perform the acoustic windows’ installation process.
Ceiling Clouds
Noise cancellation in a big bedroom will be greatly improved by ceiling clouds. This is due to the fact that both internal and external sound waves will be absorbed by the cloud ceiling. They essentially absorb the sound as it moves in the direction of the ceilings and again when it rebounds back onto the floor. By reducing and dampening reverberation, its dual absorption makes a noisy room quiet.
The design, adaptability, visual appeal, sound absorption, and superior aesthetics of clouds are amazing. The gear required for a good installation is also included in the ceiling cloud package, making installation simple. Any distance from the ceiling will do for this acoustic foam, which is placed there. The best part is that simply following the instructions in the installation guide included in the package, you can install these acoustic panels yourself.
Soundproofing Curtains
A wonderful technique to reduce noise in bedrooms is to use soundproofing materials. Velvet or suede, as well as thick polyethylene foam, are used to make soundproofing or acoustic drapes. They often have a porous surface that allows them to reduce sound leaking and quieten your environment.
High-quality and efficient sound-absorbing curtains are typically thick, densely woven, and extend a few inches past each side of the window from ceiling to floor. In essence, the blackout curtains completely enclose the space around the window. The installation procedure is simple and will only take a few minutes, which is wonderful.
Seal door
Even when closed, the door frame in your bedroom frequently lets sound in. The spaces that allow sound waves to pass will be sealed with foam weatherstripping. The fact that there are numerous weatherstripping alternatives is a plus. Always be sure that your choice can resist variations in weather or temperature as well as the wear and tear unique to your home.
Installing foam tape that hits the floor, an acoustic sealant, or a wraparound door sweep is the best way to make your bedroom more soundproof. Typically, doors require door sweeps at the bottom as well as two different types of weatherstripping foam tape for the top and sides.
You must clean the stop molding with soapy water and let it dry before installing it. The foam tape should then be cut to fit the door’s top and sides. The foam should then have the back peeled off and pressed into the stop molding’s inside. You can now trim the door sweep to suit your bedroom door after finishing the top and side. Screw the door sweep to the door while the door is closed so that its bottom is in touch with the floor.
A solid core bedroom door is another excellent option for reducing noise. Bedroom doors made of hollow wood or thin wooden boards are noisier than those made of solid wood blocks. To silence the noise, you might get a new sturdy wood or metal door.
Sound booth
Using a sound booth similar to those seen in recording studios, you may soundproof your bedroom. This method not only lessens the amount of sound that bounces in your direction, but it also helps isolate the sound before it spreads over your area. The ideal example of this type of fix would be to use a resizable sound booth or even convert your closet into one, which may cost anywhere from $50 to $2000, depending on size.
Soundproof film on Windows
Acoustic dampening window films are another practical method for minimizing obtrusive noises coming into your bedroom. Window films are typically made of reusable, easy-to-apply plastic vinyl or environmentally friendly PVC. The biggest benefit of employing soundproof films is that they will keep your windows’ transparency while reducing noise. Therefore, if you have a tight budget, you should think about adopting this approach rather than others that would just block the light.
You may apply the soundproof films to all sides of your window glass panes, and they are very simple to install. In order for the film to adhere well, you must first thoroughly clean and dry the glass panes before installing them. Then, make sure there are no air bubbles by pressing the film firmly against the windows. Finally, you can think about using acoustic caulk to seal the window edges in order to increase the efficiency of the film.
How Much Does It Cost To Soundproof a Bedroom?
The cost of soundproofing a bedroom will vary greatly because there are numerous solutions. Typically, professional soundproofing installation costs range from $10 to $30 per square foot for an existing room and from $12 to $25 for a new room. Accordingly, the price of a regular accommodation will range from $1,044 to $2,725 with an average price of $1,800.
You have the option of soundproofing your bedroom’s entire ceiling, wall, and floor, as well as specific areas. Of course, it will be expensive to soundproof the entire space. The average cost of various soundproofing surfaces is broken down below.
Cost of soundproofing bedroom walls
Different techniques and materials can be used to soundproof your bedroom walls. You should expect to pay anything from $100 to $350, depending on the method you choose and the size of your room. The least expensive way to insulate your walls against noise is with rockwool insulation, which runs about $1 to $2 per square foot. One of the most expensive techniques, resilient channel over pre-existing drywall, costs between $150 and $200.
Cost of soundproofing bedroom door
Bedroom door soundproofing typically costs $300 to $3,500 for new construction and $500 to $4,000 to replace old doors with soundproof alternatives. To test whether current doors can give a sufficient amount of soundproofing before replacing the entire door, try making minor, less expensive changes.
Acoustic door thresholds, which range in price from $30 to $100, soundproof door seals, which range from $35 to $90, and door sweeps, which range in price from $60 to $120, are a few projects you can try to soundproof doors. Acoustic panels for doors can cost somewhere between $100 and $300, and solid hollow core doors can cost anywhere between $150 and $200.
Cost of soundproofing Ceiling
Although there are not many price differences for soundproofing bedroom walls and ceilings, there are. The majority of materials used to soundproof ceilings are fairly heavy, and installing them typically requires a professional, adding to the cost. If the noise level is not too high, you may undoubtedly utilize a less expensive technique to isolate the noise.
For a total cost of $200 to $300, you can soundproof the ceiling using paint. A soundproof blanket costs $300 to $450, acoustic wall panels cost $2 to $5 per square foot, and foam insulation costs $2 to $3 per square foot.
Soundproofing is the process of reducing the amount of noise that is transmitted through a material or structure. It is important for a variety of reasons, including protecting the hearing of those who live or work near loud machinery, and reducing the disturbance caused by noise to neighbors or the surrounding community. In this article, we will explore how to soundproof a generator, a common source of noise pollution.
Generators are useful for providing backup power during outages or for powering events and construction sites, but they can also be a source of loud, annoying noise. If you own a generator, it is important to consider the impact it has on those around you and take steps to minimize the noise it generates. Soundproofing a generator can be a relatively simple process, but it requires some planning and the right materials.
Section 1: Assessing the need for soundproofing
Before you begin the process of soundproofing your generator, it is important to assess whether or not it is actually necessary. There are several factors to consider when deciding whether or not to soundproof your generator.
One factor to consider is the decibel levels of your generator. Noise is measured in decibels (dB), and the level of noise that is considered acceptable or tolerable can vary based on the context and the length of exposure. According to the World Health Organization (WHO), continuous exposure to noise levels above 70 dB can cause hearing damage, and levels above 85 dB can cause immediate harm to hearing. It is important to measure the decibel levels of your generator to determine if it falls within these ranges and whether soundproofing is necessary to protect the hearing of those nearby.
Another factor to consider is whether or not local noise ordinances apply to your generator. Many cities and towns have laws regulating the amount of noise that is allowed in residential areas, and generators may be subject to these ordinances. It is important to familiarize yourself with the local laws and regulations regarding generator noise in your area to determine if soundproofing is necessary to comply with these laws.
Section 2: Materials and tools needed for soundproofing a generator
Once you have determined that soundproofing your generator is necessary, the next step is to gather the materials and tools you will need. There are a variety of materials and products available that can be used to soundproof a generator, including:
Soundproofing foam: This is a type of foam that is specifically designed to reduce noise transmission. It is available in sheets or rolls and can be easily cut to fit around the edges and corners of your generator.
Acoustic blankets: These are blankets made of a dense, sound-absorbing material that can be wrapped around the generator to reduce noise transmission.
Mass loaded vinyl: This is a heavy, dense material that can be used to block sound. It is available in rolls and can be cut to fit around the generator.
Weatherstripping: This is a flexible, adhesive-backed material that is used to seal gaps and cracks around doors and windows. It can also be used to seal gaps and openings around the generator to reduce noise transmission.
Soundproofing sealant: This is a special sealant that is designed to block sound. It can be used to seal gaps and openings around the generator to reduce noise transmission.
In addition to these materials, you will also need some basic tools, such as scissors, a tape measure, and a utility knife.
Section 3: Preparing the generator for soundproofing
Before you begin the process of soundproofing your generator, it is important to prepare the generator and the area around it. Here are the steps you should take:
Shut off the generator and allow it to cool down completely. It is important to be cautious when working around generators, as they can be dangerous if not handled properly. Make sure to follow all safety precautions, such as wearing protective gear and keeping a fire extinguisher nearby.
Remove any debris or dirt from the surface of the generator. This will help to ensure that the soundproofing materials adhere properly and create a seal. Use a brush or cloth to remove any dirt or debris, and wipe down the surface of the generator to remove any oil or grime.
Identify any openings or gaps that may need to be sealed. Pay particular attention to areas around the exhaust and intake vents, as these can be major sources of noise. Use a flashlight or a mirror to check for any hidden gaps or openings that may be difficult to see. Make a list or draw a diagram of the areas that need to be sealed to help you keep track of them.
Gather all of the materials and tools you will need for the soundproofing process. This may include soundproofing foam, acoustic blankets, mass loaded vinyl, weatherstripping, sealant, and basic tools such as scissors, a tape measure, and a utility knife.
Set up a work area that is clean and well-lit. Make sure you have enough space to spread out and work comfortably, and have all of your materials and tools within easy reach.
Follow any manufacturer’s instructions or guidelines for your generator. Some generators may have specific requirements or recommendations for soundproofing, so it is important to follow these to ensure the safety and proper functioning of the generator.
By following these steps, you can properly prepare your generator and the surrounding area for the soundproofing process. This will help to ensure that the process goes smoothly and that the soundproofing materials are applied effectively.
Section 4: Soundproofing techniques
Once you have gathered the necessary materials and prepared the generator, it is time to start the soundproofing process. There are a few different techniques you can use, each with its own set of benefits and drawbacks. Here are four options to consider:
Option 1: Using soundproofing foam
Soundproofing foam is a simple and effective way to reduce noise transmission. It is easy to cut and shape to fit around the edges and corners of your generator, and it can be easily removed if needed. To use soundproofing foam, follow these steps:
Measure the areas of the generator where you will be applying the foam. You will need to cut the foam to fit these areas.
Cut the foam to the appropriate size and shape using scissors or a utility knife.
Peel off the backing from the foam and press it firmly into place around the edges and corners of the generator. Be sure to press it down firmly to ensure it adheres properly.
Option 2: Using acoustic blankets
Acoustic blankets are another effective option for soundproofing a generator. They are made of a dense, sound-absorbing material that can be wrapped around the generator to reduce noise transmission. To use acoustic blankets, follow these steps:
Measure the areas of the generator where you will be applying the blankets. You will need to cut the blankets to fit these areas.
Cut the blankets to the appropriate size and shape using scissors or a utility knife.
Wrap the blankets around the generator, securing them in place with tape or velcro strips. Be sure to wrap them tightly to create a good seal.
Option 3: Using mass loaded vinyl
Mass loaded vinyl is a heavy, dense material that is effective at blocking sound. It is available in rolls and can be cut to fit around the generator. To use mass loaded vinyl, follow these steps:
Measure the areas of the generator where you will be applying the vinyl. You will need to cut the vinyl to fit these areas.
Cut the vinyl to the appropriate size and shape using scissors or a utility knife.
Apply the vinyl to the surface of the generator, pressing it down firmly to ensure it adheres properly. Be sure to overlap the edges to create a good seal.
Option 4: Using weatherstripping and sealant
Weatherstripping and sealant can be used to seal gaps and openings around the generator to reduce noise transmission. To use these materials, follow these steps:
Identify any gaps or openings around the generator, such as around the exhaust and intake vents.
Cut the weatherstripping to fit these gaps and press it into place.
Use the sealant to fill in any remaining gaps or openings. Be sure to apply the sealant evenly and allow it to dry completely before using the generator.
Section 5: Finishing touches
Once you have applied the soundproofing materials to your generator, it is important to finish the process by reattaching any panels or covers that were removed, testing the generator to ensure it is still functioning properly, and checking the decibel levels to ensure the soundproofing is effective.
Reattach any panels or covers that were removed during the soundproofing process. Be sure to secure them firmly in place to ensure a good seal.
Turn on the generator and test it to ensure it is functioning properly. Be sure to follow all safety precautions when operating the generator.
Measure the decibel levels of the generator to determine if the soundproofing is effective. If the levels are still too high, you may need to add additional soundproofing materials or try a different technique.
Conclusion
Soundproofing a generator can be a simple and effective way to reduce noise pollution and protect the hearing of those around you. By following the steps outlined in this article, you can successfully soundproof your generator and minimize its impact on the surrounding community.
Remember to always follow all safety precautions when working with generators, and be mindful of local noise ordinances when operating your generator. Regular maintenance and upkeep of the soundproofing materials can also help to ensure their effectiveness over time.
As people move, converse, work, and prosper above, their noise filters through the building to the rooms below, passing energy through and fostering an unfavorable environment. The main offender is frequently foot noise; as people move about on levels upstairs, their noise easily permeates into the spaces below. As a result, security, comfort, and privacy are compromised, which is upsetting.
We frequently overlook the possibility that floors are also leaking sound due to our collective obsession with other surfaces. In fact, knowing how to effectively soundproof a floor will be crucial if you reside in an apartment above someone else. Actually, there’s no reason not to soundproof the flooring even if you share a home with relatives or roommates. It might be as simple as choosing a thick rug to muffle your footsteps. On the other hand, it may be as challenging as installing a completely new layer of flooring if the in issue floor is hollow and thin.
But before diving into this subject, you need be familiar with some floor soundproofing fundamentals. Let’s talk about the many types of noise you’ll need to block before you understand the best strategies for doing this (and how much you’ll have to spend on it).
Types of Noise That Can Enter Through the Floor
You probably already know there are two types of noise you have to contend with if you have done any soundproofing projects. The majority of the time, actual openings in your floor allow airborne noise to enter your home. In contrast, vibrations from impact noise are transmitted through the floor. The majority of structures are constructed in accordance with rules that make sure sound can’t pass through solid surfaces. Making sure that all of those surfaces—walls, floors, and ceilings—are airtight is the primary approach to stop that. That is sufficient to keep heat and sound from entering or leaving a room.
However, impact noise, which is undoubtedly more challenging to manage, is typically not covered by construction requirements. We can build airtight walls and floors using the same timber studs and joists, but they also transmit structural sound. Buildings are supported by them in order to prevent them from collapsing, but they can also transmit vibrations thanks to them.
We are more susceptible to noise carried by structures if the surface levels of walls, floors, and ceilings are not separated from these substantial core frames. The vibrations caused by a truck passing in front of the structure can be felt all the way up to the ceiling. In every area of the home, we sense them more than we hear them. The sound our feet create as we move across a hollow floor is analogous.
The flooring, which is often fastened directly to the subfloor and in turn attached to the floor joists, vibrates as a result of the impact. The ceiling drywall on the opposite side of that frame is attached to it, making it simple to transmit structural shocks. But that’s only the most fundamental justification for how soundwaves travel.
Best Ways to Soundproof a Floor
The following list of soundproofing techniques covers everything from the simplest over-the-floor fixes to the trickier treatments you’ll need to use below the floor’s surface level. But in the end, you ought to be able to put all of these answers into practice on your own or with a friend or two. Having stated that, let’s get started.
Lay Down Some Rugs or Carpets
Laying down a rug is the simplest approach to reduce the noise your footsteps generate when you go across hard floors. No matter how challenging they may be to clean, thick, soft carpets are going to be your greatest option.
Additionally, if you have a choice, choose a more tightly woven option as opposed to the simplest, loose models. Of course, anything as thin as a T-shirt would work if minimal sound absorption is all you’re after. Regardless of what you choose, it will prevent you from immediately stepping on highly reflective materials like laminate. Your step will be more audible if the floor underneath it is hollow and therefore resonant.
A carpet would not only muffle the sound of your footsteps but also reduce the likelihood of an echo in the room. You could suspend carpets from the ceilings or walls if it bothers you a lot. But let’s not stray too far from the topic. In the end, placing a few rugs on the floor can be among the cheapest floor soundproofing techniques on this list. To begin with, you would need to already possess some. Before laying them down, you should thoroughly wash them if they are in storage.
You’ll notice a difference in the room’s acoustics as well as the volume of sound that travels to the floor below. Don’t worry if you don’t already have any carpets you could utilize. If you don’t want to, you won’t have to spend a lot of money. You should be all set if you can just get a big, comfortable carpet like this one.
PAGISOFE Super Soft Shaggy Rugs Carpets
No products found.
KMAT Kitchen Mat

- Comfortable:The KMAT anti-fatigue kitchen mats are ergonomically...
- Non Slip:The top of the anti-fatigue mat is designed with an...
- Easy to Clean:Our non skid washable kitchen mats and rugs are easily...
Put a Rug Underlay Under the Carpet
If the rug you choose doesn’t exactly cushion the shock of your footfall, an underlay could be able to transform it into a plush memory foam carpet. The underlay should be nearly undetectable beneath your rug, despite its thickness. The impact it makes, though, will be obvious.
But in reality, you can easily cut it down to the required measurements regardless of the size you purchase. To complete it, all you’ll need is a pair of standard kitchen scissors. The mat should ideally be approximately an inch smaller on all sides than the rug you wish to slide it under. You won’t trip over the edges thanks to the carpet’s ability to slope on the sides and create a beveled impression with that additional inch.
Moynesa Ultra-Thin Washable Vintage Area Rug
No products found.
jinchan Area Rug 5×7 Persian Rug

- Ready Made: Our foldable rug size(5'x7') comes folded in a smaller...
- Superior Material: Made of sturdy synthetic fibers, our area rug has a...
- Easy Care: Please unfold the rug when you receive it. There will be...
Rubber Mats
A rubber mat underneath your carpet is undoubtedly a more understated option than underlays. Rubber is after all flexible enough to absorb impact sounds and dense enough to block airborne sound from traveling through the floor, making it invisible when covered with a rug. Even the most basic rubber should be able to have some of the same effects as increasing the interior mass of your floor. All things considered, mass loaded vinyl, a well-known soundproofing material that we’ll talk about later, and neoprene are fairly comparable. Rubber and MLV don’t have any of those spaces that allow sound to easily pass through like woven materials do.
Rubber is sufficiently flexible to absorb any impact, but it won’t likely be as absorbent as memory foam. Fortunately, there are several items that fall in between those two extremes. If you still want to give your floor some bounce, rubber foam mats, similar to those used on exercise equipment, are a terrific choice.
Moreover, there are additional justifications for wanting a rubber mat. For instance, the carpet itself could not have a backing that prevents slipping. A simple rubber mat under your carpet in that situation, even one with ribs, might practically save your behind. After all, falling would unavoidably cause quite a bit of noise.
In the end, all of the options we’ve examined so far are rather simple. You can layer them by putting the rubber down first, followed by a memory foam underlay, and then a carpet on top. However, there’s no need to go overboard. In reality, you might utilize the following product as a different option.
VersaTex Multi-Purpose Recycled Rubber Floor Mat
- PROTECT FLOORS: Safe to use on any hard floor or carpeted surface to...
- USE ANYWHERE: Designed for indoor or outdoor use, this multi-purpose...
- DURABLE MATERIAL: Made from recycled materials in the USA; repels...
Interlocking Floor Mats
Interlocking floor mats may be the solution if you don’t want to cope with a large rubber roll or rectangle. If you need to cover a peculiarly shaped space, puzzle-piece mats are also fantastic. Additionally, they are excellent at absorbing impact sounds.
Another item you may place under your treadmill or workout bike is an interlocking floor mat. However, they aren’t the only things you can do with them. They could be utilized similarly to any of the carpet underlays you have previously viewed. Instead of covering the interlocking floor mats with a carpet, you might leave them out in the open.
Since many interlocking floor mats include a variety of tile colors, you can use them to design a pattern on the floor. These 0.4-inch thick innhom tiles are available in various combinations of gray and black. They also have a texture that you might like, especially if you like the industrial style. Other interlocking mats, on the diverse hand, come in a number of other tones or even a combination of colors. These goods typically also come with edge pieces that you may affix to the sides. These can improve the overall appearance and take away any potential tripping hazards.
Gluing the mat to the floor is another option that can help you avoid that. That might even improve the dampening properties of the mat, particularly if you seal it with Green Glue or an acoustic caulk. However, you would need to be prepared to risk damaging your current flooring. hese tiles aren’t quite suited for all places, yet they can look great in gyms and nurseries. It will be up to you to decide if interlocking tiles are the best option for the floor you’re trying to soundproof.
ProsourceFit Puzzle Exercise Mat ½”, EVA Foam Interlocking Tiles

- PROTECTIVE GYM FLOOR MAT: Durable, non-skid gym flooring for home gym...
- HIGH QUALITY FOAM: High-density EVA foam mat provides excellent...
- VERSATILE: The water-resistant, noise-reducing design is easy to...
Cork Tiles
It is possible to utilize cork over or under flooring, making it an excellent soundproofing medium. Even if you choose to leave them exposed, thick cork tiles can soften your floors without looking odd. The majority of cork items aren’t waterproof, which is the only drawback. But cork is still relatively water-resistant even though it isn’t entirely waterproof. Additionally, it has certain anti-microbial qualities, so even if you spill on the tiles, mold development won’t be a problem. Keep them in places that don’t get wet very often if you want to be safe rather than sorry. A rubber mat is a better alternative if you need to soundproof a kitchen or bathroom floor.
Currently, cork tiles come in 12-inch square or hexagonal shapes. Because their primary purpose is as push pin bulletin boards, these goods are typically fairly thin. Additionally, most of them come with mounting tape or have a self-adhesive back.
The tiles could be fastened to a piece of rubber if you don’t want to glue them to the floor. That will not only allow you to move the cork anytime you need to, but it will also make it more effective. To make your carpet thicker, you may also adhere them to the underside of it. To begin with, soundproofing will only be possible with tiles that are at least half an inch thick, so bear that in mind.
Install Soundproof Floor Underlayment
Instead of using better underlayment materials, the majority of flooring contractors simply leave the thinnest layer of plywood underneath your floor covering. However, you’ll need something that can stop sound from escaping downward if you want to soundproof your floor effectively. Soundproof floor underlayment can help with that.
Plywood is after all very reflective, thus any incoming impact sounds won’t be muffled by it. Furthermore, even airborne sound can pass through the cheap plywood sheets because most individuals don’t bother to apply sealant between them.
To change that, though, you’ll need to be aware of how your floor appears beneath that top layer. Considering the typical setup, your floor likely has the following:
The flooring, whether it is linoleum, tiles, hardwood floorboards, or any other type you may have installed
The coating of sticky, typically made of cement or glue
Underlayment, which is often made of plywood slabs,
The foundation (thicker plywood that provides a stable surface for the rest of the floor layers)
Therefore, you’ll need to access the sub floor once more in order to correctly install the underlayment soundproofing materials. The next step is to choose the ideal soundproof underlayment for your apartment floor. They wouldn’t be a good option for every space because some of them don’t have a vapor barrier.
Floor underlayment is a flooring materials available in rolls and typically contains a peel-off tape strip on one side. Any airborne sound should be eliminated by joining the parts into a single large surface, and impact noise will be reduced by the product’s soft foam, felt, or cork core.
MP Global Products Laminate Flooring Underlayment with Attached Vapor Barrier Offering Superior Sound Reduction

- For use under laminate and hardwood flooring
- Approved for floors with a pre-attached pad, ensuring broad...
- Moisture barrier with Dri-Wick technology protects from subfloor...
Noise Proofing Compound
It is possible to reduce noise coming from either side of the floor by using the well-known Green Glue Noiseproofing Compound, sometimes referred to as a sound dampening compound. It may be put directly on the current subfloor or in between two solid surfaces. The floorboard and the underlayment can be placed between them, in other words. Environmentally friendly, odorless, and non-hazardous, Green Glue Noiseproofing Compound is safe to use. You don’t need to be afraid to deal with things on your own.
It may be applied quickly, is simple to clean, and can cut down noise by up to 90%. After being applied for 30 days, Green Glue performs at its best in terms of absorbing sound. Purchase an adequate quantity of Green Glue before using this damping agent. Before handling the compound, carefully read the manual and take simple measures like donning gloves.
Place the underlayment or a hardboard, such as cement board or medium-density fiberboard (MDF), on top of the compound, which has been applied to the subfloor with a caulk gun. Install your carpets and floors as necessary. As previously mentioned, the sound-dampening chemical needs no more than thirty days to reach its full potential. In order to use this soundproofing technique, you may also make a professional assistance call.
Green Glue Company 10730 Noiseproofing Compound
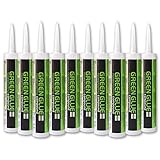
- Sold in cases of 12 (29oz.) tubes per case.
- Each case comes with installation instructions (in English and...
- Better results for low frequencies
Floor Joist Isolators
You’ll utilize floor joist isolators, which are substantial pieces of rubber, to isolate the floor joists from the subfloor. They should reduce the amount of noise that is transmitted to the floor below through these structures. Additionally, they will stop any squeaking that might be brought on by those two surfaces rubbing against one another.
Decoupling your floor from the rest of the building structure is only possible in one way. Use joist isolators, please! These straightforward rubber components are inexpensive and small, so they won’t significantly alter the height of your floor. Additionally, they’re also rather simple to install. Simply attach them over the typical joist frame so that they are spaced between 12 and 24 inches. The main challenge will be re-nailing the subfloor, but as long as you follow the product directions, you shouldn’t have any issues.
Soundproofing an Apartment Floor
You might wish to take precautions to avoid your downstairs neighbors hearing anything you do above them. However, you won’t be permitted to perform any building work if you reside in a rental property. However, you could reduce the noise with MLV, carpets, and other goods.
Although breaking construction codes and opening up your apartment’s flooring is not an option, you might still apply some of the options I mentioned at the start of the list. Put down some carpet, rubber, or MLV underlay and cover it with rugs. The concerns from your neighbors should now be over!
Why Bother Soundproofing an Office Space?
The level of productivity may suffer in an overly noisy atmosphere. One study found that a noisy workplace might reduce productivity by 66%. Not only does production decline, but your employees also experiences the consequences. Worker health might be negatively impacted by excessive noise. According to a study conducted in Germany, prolonged exposure to 65 decibels, which is the noise level of an open office or classroom, can raise someone’s heart rate to that of a heart attack.
Although soundproofing won’t completely eradicate noise in a space, it can reduce it to more manageable levels and stop workers from whining that they can’t hear their own thoughts.
The impressions that other people may have of your office space are a further, frequently disregarded reason to soundproof it. People visiting your company should be greeted with a professional hum throughout the workplace, not a cacophonous symphony comparable to a playground, if you host clients or are attempting to attract talent.
Soundproof Office Door
If closing your work from home office door does not eliminate the annoying noise, try to office soundproofing with sound absorbing materials. Install weather stripping through the bottom of the door to prevent background noise from passing through the office space. Alternatively, you can slide the door sweep down the door. In addition to reducing unwanted noise, this technique can also help improve the comfort of your office, as it can block drafts and prevent heat from escaping. If your existing door is empty, replace it with a hard core door. Solid doors are much more efficient at absorbing sound than their empty parts. Most homes have empty interior doors, but if you are not sure if the door is empty or tight, knock on them. If you feel like you’re dropping a thick piece of wood, you have a solid core door; But if it is seen inside empty, the door is empty.
The door is certainly the biggest problem of your home office. Various measures can be taken to make the door soundproof. The cheapest and fastest way to make your door soundproof is to get an affordable soundproofing strip (like Amazon’s) under and around the door. I like this soundproof ceiling strip because it’s adhesive so you can literally wrap it up and stick it with the door stuffing and you’re done. This will at least prevent the sound of direct entry into your office. Having an open crack under your door does not take into account the thickness of your door.
If you have a carpet under your home office door, you will also need a windbreaker that slides under the carpet to provide sound insulation. So you will use the tape on the top of the door and stuff the door, and hang the door under the door. Next, consider replacing your door with a hard core door. Go to your door and knock on the door. If it feels as heavy and dense as a piece of wood, you have a hard core door all exterior doors will have a hard core. Doors leading to any other interior room in the house often have empty main doors, which makes for very little for soundproofing.
Seal Up Office Wall Holes
It may appear that the walls of your office are solid, but you may be surprised to find several small holes. For example, if the wires pass through a wall from a side room, the c wires are twisted through a hole in the wall. Although the holes may be small, airborne sounds can easily pass through them; If there is a collection of holes, they can be the main source of unwanted noise.
Examine your walls to check for holes. If any of these are available, plug them in. If a wire goes through the hole, cut a piece of sound dead foam or insulation and press through the holes around the wire. If the holes are empty, seal them completely. For larger holes, use rock plates to close them; Small holes can be sealed with a little tape and gloss.
A large wall is a great sound blocker, but if it has holes, it is useless. Inspect your home office walls and ceilings and if any punctures are found, fill them with sound-damaging materials as fiberglass insulation.
Soundproof Office Floor
If the sound is coming from below, place an acoustic panel on the floor and ideally cover it with carpet, which provides additional sound absorption. If your home office is upstairs – above a garage, to the right of your family, or your child’s playroom – for example – and the sound from below is coming into the room.
If you have the option to install a new floor, be sure to install a soundproofing underlayment before installing the new flooring. There are different types of soundproofing underlets for floors. Options include month load vinyl (MLV) which is suitable for tile, wood and laminate floors, while soundproof padding is ideal for carpets. Will help to absorb and / or support underlying structural noise control.
If you are unable to install a new floor plan, try covering the floor with a thick blanket; The more frequent the rages, the better. Cover the soil as much as possible. This will create a sound absorbing cushion, so to speak, which will help prevent annoying noise pollution from below.
Soundproof Office Windows
Having an office with a window facing a busy street can be a major source of unwanted noise, especially if the window is an old single-blade model. If this is part of the budget, consider replacing the old window with a new double or triple glazed unit and installing heavy shutters or internal shutters to shut off more noise.
If you’re on a budget, install soundproof screens from brands like Acoustic Curtains like ™ If you want to invest in more powerful soundproofing, install double-glazed windows that can help increase Noise Reduction Coefficient with white noise.
Soundproofing Blankets for Office
Sound absorbing blankets are an easy and affordable way to prevent unwanted background noise. These blankets are thicker than a standard blanket and a have great Sound Transmission Class. Hang sound absorbing blankets along the walls. Install them like wallpaper, protect them using nails or tape. If you want to be able to easily remove covers, use tacks to hold them in place or run screen rods along the walls and draw covers over them.
You can also use sound-reducing blankets to prevent noise barrier from entering the door. Draw a blanket behind the door, secure it with nails or tape and cut off any excess material. This technique can significantly reduce annoying sound wave. Also, depending on the type of blanket you are buying, they can add visual appeal to the office space.
Preventing Structural Sound
The only way to stop structural noise is to use isolation techniques. This basically means separating the layers of your wall so that the vibrations of the sound go damp and do not infect other layers.
So the way you do this is to hire an official to do a second coat of drywall on all the walls of your office. Frequency. When your DIWAR arrives, you need to have sound channels and sound clips that they will install between layers of drywall to stop the sound.
Noise-Proof the Ceiling
The main source of noise in a basement home office is probably sounds coming from above. Consider installing a drop ceiling for long-term noise reduction, and fill the area between the old ceiling and the new dropped panels with high-density insulation to rapidly quiet down the office.
Vans are notoriously noisy. They are not designed for luxury, and walking around in large sheet metal panels is a recipe for acoustic and vibration amplification. Depending on your sensitivity, a noisy vehicle can wear out while you are driving and become angry at night when you hear footsteps two blocks away. The simple and inexpensive solution is to use earplugs. But if you’re doing a van conversion, the outside noise reduction options are at least worth considering. Thanks to audiophiles around the world, there is no shortage of sound deadening material and tips for reducing sound from the outside world. When planning, keep in mind that you are not trying to create a sound barrier. The more layers and complexity you have in your camper van, the more weight you add and the more you have to deal with if you need to, for example, fix a water leak. With that warning, let’s dive in!
How To Soundproof a Van Floor
The ground is the most important surface to be protected as all the vibrations generated by the road are transferred directly to it. Here you have two options. Install a Soundproofing Van Floor Mat like Dynamat, or Noico ones or Install Mass Loaded Vinyl. Right off the bat I have to say that floor mats are a better choice simply because of the adhesive backing, which means you won’t need to use any glue spray, although I’m recommending you to. The steps are exactly the same whether you go for Noico Mats or for the MLV, the only difference is that you have to use glue spray to comply with MLV. You must first remove all floor mats in your van. After doing this, clean the van floor, wheel arch etc. well otherwise it will not last as long as the adhesive. Then all you have to do is remove the glue back from the Noico floor mats and install them.
These can be cut to make installation easier and more precise. The more camper vans area you cover the better. Place the entire floor of the pickup truck in front, from front to back. Be sure to cover the wheel wells as well. If you arrange to remove the seats to apply the floor mats better, do so too!
Use the wooden roller to adhere firmly to the mat and MLV, even in wheel wells. Once the installation is complete, you can put the rugs removed at the beginning again. Installing carpet can not only block the sound, but also help absorb sound waves inside the van, causing van soundproofing.
How To Soundproof Van Doors
Soundproofing Van Doors is very easy but you will need a little time and effort to remove all the panels that cover the door because the goal here is to access the interior of the door. If there are speakers inside the door, be sure to remove them as well. Since the van door is empty, vibrations will easily create reabsorption on these thin sheets of metal. Here you need to install materials to absorb these vibrations. Use an alcohol scrub to clean all surfaces of the door to remove grease and oil. Then you need to apply the insulating material. Soundskins Pro Door Kit which will give you the best possible results.
How to apply the insulation foam to the car’s door?
The first step is to cut a few pieces into squares. Then remove the glue backing and stick it on the inside of the outer door leaf to stop road noise. The more areas you cover, the more effective it will be, but if you are on a budget, you may want to consider just a few pieces and spread them out evenly. You need to cover at least 25% of the total area. This will reduce vibration.
Now is the time to work on the interior of the door. Here I would suggest using only a large element to heat the interior. It’s much easier than cutting a lot of small pieces and sticking them to the door and it’s actually better because you don’t put places between them where you can go through the words. Place the cardboard on the inside of the door and using a pencil, looking for the entire surface where you want to apply the insulation.
Be sure to leave room for moving parts, such as locks and screw holes. Then cut out the cardboard and use it to transfer the shape to the SoundSkins. When you cut it, remove the protective support peel and stick it on the door and you’re done. Again, use the wooden roller to hold the SoundSkins firmly in place.
Van Thermal Insulation
Van Thermal Insulation is important for van life, as these vans require high quality insulation, as you want to be quiet while traveling. For better insulation you need to get some heat thinner and insert it into the foam liner.
If you’re not worried about the weather and don’t want to panic, letting you go to places like Alaska in the middle of winter will help drastically to keep you out of the noise and out of the cold van. Cold and noisy.
Van Sound Deadener
All you need for this is a sound absorbing mat, which can be easily purchased at any store with insulation equipment. According to customer reviews, the Noico Sound deadening mat is by far your best choice.
When you buy the mat, you need to install it on the metal panels of your van which are usually found on the side, roof and door. You will get the best results if you also cover the exterior panels.
How To Soundproof Van Roof
It’s pretty easy to do, just cut it to the required size and stick it. For easy installations it is best to use a few smaller pieces instead of larger ones. Then you need to use Vibro 6mm closed cell foam and glue it to the roof. Just measure the width of the roof and cut it.
Since the roof has dents and ding, cut it a little wider than the actual width of the roof so that it is not shortened. This closed cell foam comes with an adhesive backing which means installation should be very quick and easy. You can choose to cover it after installing it, but I think it looks great!
How To Soundproof Van Windows
This is something you will only want if you are using the van for business purposes and do not care too much about the window capacity. First you cut the appropriate size of the window using the same soundskins on the doors. Remove the adhesive backing and stick firmly with a wooden roller. Then cut a piece of Vibro 6mm closed cell foam by fitting it to the window panel.
What to Avoid while soundproofing a Van
During my research, I came across some erroneous information about van noise reduction on the internet. Luckily, you’ve come to the right place – did you know that I would never advise you to do something that I wouldn’t do on my own? If you read this and act on what you read, I guarantee you won’t have any problems with your soundproofing project.
Don’t buy words that promise to solve all word problems after you apply the words. Most of the time, these products are inferior because there is no way that any product can solve complex problems with van noise that can only be solved with a few layers of different insulation materials.
Do not use adhesive tape! Flashing tape is made with bitumen (the same thing is used to make concrete) and it shrinks quickly because it is extremely sensitive to temperature changes and you know these are very common in vehicles.
Do not use bubble wrap! Yes, it can be quite cheap and many people recommend it but it is basically useless in terms of both thermal insulation and sound insulation, so you should definitely avoid using it at home. This is the end
Do not use fiberglass! This material is very toxic and dangerous to work as well as very sensitive to moisture and it absorbs very quickly. This is not the safest option, especially if your van has concentration.
Conclusion – Van Noise Reduction
After reading this entire guide, you may think that soundproofing a pickup truck is a complicated process that takes a lot of time and money, but to be honest, if done correctly, it shouldn’t take more than two hours and it’s not too much investment. The important part is of course the floor. If you are on a budget and don’t want to make the whole van soundproof, start from there.
Overall, soundproofing your van is not an easy task, but if you are well-informed and know exactly what to do, you will have no problem doing it, even if you have never had experience of soundproofing by yourself. . Of course, if you think it’s a bit too much for you, you can always bring a professional.
By following the steps I have given you, you will not only be fascinated by the results, you will also have fun doing it. Also, make sure you don’t forget what to avoid when making the van soundproof. There is a lot of bogus information on the internet and I don’t want you to fall for it. Good luck!
Soundproofing your car significantly reduces noise to a tolerable level. The benefits of soundproofing, however, are very subjective. One person may understand the word as a word, but another person may find it very annoying. The same is true when it comes to driving, some people find it better to feel rolling on the road, hear screams and work outside. But nothing. This is where soundproofing comes in.
Often, cars are determined purely by buyers based on their presence and performance and not on the noise level of the interior. Unfortunately, long exposure to sound is not good. Fortunately, some cars have been perfectly designed. But unfortunately for the majority, these cars are kind of luxurious. Check the reality, not everyone can afford BMW, Audi, Lexus etc. Prices are on top of our league. Kudos for those who can afford it, but for those of you who can’t, here are some tips on how to make any sound soundproof from street noise.
Chances are, if you do the usual 9-5 tasks, you may be stuck in one or the other place in traffic. It happens to almost everyone and it is something that is almost impossible to avoid completely. As you sit in traffic the sun descends on your windshield, the sound of construction machinery, angry drivers and extra loud stereos begin to catch your eye.
This experience was at least a little less painful if only to drown out all the noise. You are lucky, because there are many ways to make noise in the outside world of their car. And if you think about car noise purifiers, we think that’s exactly what it is! Today we are going to take a look at some ways you can make your car soundproof!
How To Soundproof A Car Roof
Want to soundproof your car? It is a normal rain but instead of sounding like a white sound instrument, it becomes annoying to drip, calm down and relax? Probably because the roof of your car is too thin. Apply sound deadening materials and add thickness to your roof to make it soundproof.
Dynamat is easy to use. Simply remove the padded layer from the roof and place the sound-absorbing mats inside. Then put the original cover back on. Just adding thickness to the roof reduces a lot of noise.
Usually it is self-adhesive, so the ease of application is ensured. Very skeptical about this move? You will be surprised that the sound is coming from the other side of your car, but above.
How To Soundproof Car Door
Like the house, the biggest opening in the car is its four doors. Typically, car doors are thin and passages are made to make noise to enter the cabin. Making them soundproof is a great option to at least block or reduce street noise. Before you start, you may want to prepare yourself first, as it is not as easy as sticking to a self-adhesive sheet. Above all, be careful when choosing materials to use. Installing an extra layer of soundproofing material will add weight to the door and you need to keep in mind that it weighs more. This can damage your door fixing system.
First remove the door from your car by removing the screws and panel. Then place acoustic foam such as Silles Anti-sound foam for doors that will not interfere with the final use of any door. It is important to make sure that what you use is best sound deadening In this case, sound absorbing foam is recommended. These are the common qualities of soundproof foam specifically designed for doors. In addition to foam, verbal mats like dynamite are easy to use. It provides sound protection but has adhesive on the other hand. This ensures that it sticks well, is flat and does not make bubbles
At this point, you can also check your car’s seal and see if everything is OK. In some cases, the door seals become loose or worn out. If Weatherstrips are possible then a small fixable problem is your luck. If not, try a new replacement. Before reinstalling, please check other rubber gaskets such as windows and trunks. Hold on to keep the rubber noises out, if the thing mentioned needs to be replaced, do it while heating the door panel. After reinstalling, check your door if you succeed in turning your door. Try opening and closing it a few times to make sure there was no damage during your removal.
How To Soundproof a Car Floor
The floor of your car has a very large area and is closer to the wheels and axles of your vehicle. This means that vibrations go right in there and can often be amplified by the ground, creating a lot of noise inside your car! The best way to minimize vibrations that go through the floor of your car is to lay down a sound absorbing mat (also known as a foam shield).
As close to the road as possible, your ultimate goal is to reduce external noise (street noise / traffic) if you need to improve your car floor. Don’t worry, the soundproofing of the car floor isn’t too complicated even newcomers can try it. At least one hour is enough to finish the soundproofing of your floor. Remove existing carpets from your car. Although it protects the car from dirt, it does very little with the help of sound insulation. Add sound absorbing mat like Dynamat or FatMat Sound Deadening Foam. It will absorb vibrations from your floor and significantly reduce road noise. One of the best soundproofing mats available to reduce road noise is Dynamat (it’s quite expensive, so check out some of these Dyanamat alternatives if you want to save money):
DynamatThick Self-Adhesive Sound Deadener

- Reduces Unwanted Noise, Heat & Vibration: Dynamat Xtreme reduces road...
- Trusted by Car Lovers & Professionals Alike: Dynamat is used by the...
- Xtreme Bulk Pack: This pack contains 36 square feet of Dynamat Xtreme...
Dynamat is relatively easy to install, simply:
Take off the mats.
Cut to fit your car (use your existing floor mats as a template for trimming).
Remove the backrest.
Glue and press the Dynamat into place.
Replace your original floor mats on top.
Enjoy the peace!
A word of caution though, Dynamat is very sticky so try to avoid sticking it to yourself as it can be painful and frustrating to remove.
Noico also makes a very good sound absorbing foam, significantly cheaper than Dynamat. Second Skin Damplifier Pro is a good alternative to Dynamat if you are looking for even better performance.
Noico 80 mil (2mm) 18 sqft (1.7 sqm) car Sound deadening mat
No products found.
Fatmat Self-Adhesive Rattletrap Sound Deadener
- One 18 inch wide x 33.5 feet long Roll of Self-Adhesive RattleTrap (50...
- 80 mil nominal thickness with Patented "Super-Stick" Adhesive
- Sound Deadening Acoustic Insulation for Automotive, Marine, Home, RV
Lower your floor first to make it easier to fasten the groundsheet. This type of mat usually has an adhesive side and is water resistant. These are also heat resistant, so don’t worry your feet will feel too much heat. These features are extremely important because the ground causes almost all kinds of damage to our shoes and near the floor engines of cars. Groundsheet batting can be further improved using rollers. It will stick seamlessly and disappear while covering the original carpet. If the larger sound reduction is reduced, the floor mats can be covered with reflective insulation.
Reflective insulators are commonly used for heat protection, but also due to its soundproofing capabilities, it is better to use them together with soundproof mats. When used simultaneously, noise reduction is widely achieved. For economic reasons that you can’t afford sound buying rugs, plush rugs and carpeting techniques can do in your home The reduction is not as drastic as rugs, but a fair devaluation can be expected.
Soundproof Car Floor Damping Mats
Most cars have floor mats that help hold dirt and make driving more comfortable but from the ingredients they don’t do much to make your car soundproof. For this problem you need to use something called Dynamite or Damplifier Pro. This is often used for undercarriage soundproofing – this is what we do to prevent noise coming from your floor (the floor is not as thick as you think). These products include butyl rubber with a sheet stress layer on the one hand and adhesive on the other to help the carpet adhere to any surface.
Foam is a material that helps absorb sound from vibrations that can enter your car, which can reduce road noise. Despite having several “soundproof floor mats” that you can fit in your car, we see the Damplifier Pro and Dynamat as cut on top of the rest. That said, these shock mats will cost a lot of money, but no one said that making your car soundproof would be a cheap business. On the bright side, they help reduce road noise, which is definitely worth it (especially if you get stuck in traffic for at least 2 hours a day).
Soundproof Car Floor Reflective Insulation
So we tried Dynamats we were talking about and if they were good they wouldn’t be as good at sounding like you die. You may want to try adding an MLV sound barrier like the second skin Luxury Liner Pro. The only way to block excess noise flowing through your car floor is to use the second, frequent barrier level. Luxury Liner Pro is the best option for automobile use.
An MLV barrier will help to further increase the amount of noise blocked by soundproof mats, sometimes canceling the sound up to 80%. Not only that, but the combination of closed cell foam and mass-loading vinyl in the Luxury Liner Pro will add insulation that will keep your car cool. This will help you a lot when trying to warm your car in the winter. If you are looking for a less expensive option, you can add reflective resistors to your car instead. It’s not thick enough to block a lot of noise, but it will do a lot to increase insulation.
How To Soundproof Car Trunk
Most of the time, the trunk or rear of the car is not often blamed as one of the noise generators. Not knowing this, they and their soundproofing list are a great addition. Just like your floor, the trunk is easy to soundproof if you want. The wheel arch of your trunk is already surged, but adding butyl foils is best to reduce scattering on the back. Low-frequency noise often comes from behind the car.
The first method is to moisten the sound. On the other hand it is easiest to use one that has glue. This reduces the vibration of the incoming sound and converts it into thermal energy. As such, sound absorbing components should be flexible and heat resistant. Premium 2.2 from CTK is a good component.
Empty your trunk and remove the existing carpet to glue your material to the sheet metal. Dimensions – Top, bottom, measure the sides and cut out the selected sheet. Pay attention to the pins and other screws so that it is not difficult to hold your original upholstery behind.
The soundproofing sheets are then fixed by holes with the help of aluminum tape and a camouflage gun. Cover with real car mat. The soundproofing method will not only reduce the noise, but also improve the sound quality of the sound system inside the car.
How To Soundproof A Car Engine
Do you think the engines should be higher? You are probably right. The good news here is that you can now effectively reduce the amount of noise you make without compromising. One good thing to keep in mind is that diesel engine noise are kind of noisier than petrol types. This is due to its mechanics, but petrol engines make noise due to aging.
Since we are talking about motors, we will work with enough dense, heat-resistant, tear-resistant soundproofing material as well. You can try and use Quiet Barrier™ Specialty Composite. It is a super efficient mat with triple sound protection. The foam mat gets the sound which is usually the higher frequency, blocking it and “sending” it to the source.
The penetrating sound is absorbed by the acoustic foam and blocked by the barrier layer of the carpet. Thus, its noise reduction is highly appreciated even for industrial use. Although its heat resistance and durability are considered, especially the Covet Barrier combination is easy to install on your hood. It is a shell and sticky stat that anyone can use. Just measure where it will be placed, set up and you’re good to go.
How To Soundproof Car Tires
If we scale the combination of road noise, more than half of which is due to tire noise. It affects you, other motorists and pedestrians. Protect your car from road noise by protecting your car’s quiet tires. This affects you, other drivers and pedestrians. Protect your car from road noise by protecting your car’s quiet tires.
It should also be understood that the noise generated depending on the type of vehicle follows the rule that the larger the tire, the more noise the area that will come into contact with the road, the more noise there will be. So basically trucks and SUVs are louder than sedans. Smooth roads are also quieter than tires. However, you cannot choose the road, so you can only buy soundproof tires or cool tires for all seasons.
How to Soundproof Basement Ceiling
If you want to know how to soundproof a basement ceiling, you are probably interested in keeping noise out of your home. After all, when not used as cellars or storage rooms, basements can serve other purposes. More specifically, they can serve as men’s sanctuaries, entertainment venues, or music studios. Of course, most of these functions tend to be quite noisy. But even if you’re only using your basement to escape a noisy fireplace, your soundproofing efforts will need to focus on the ceiling. However, before we learn how to strengthen this surface against noise, let’s start with the basics.
You can use different techniques to make the basement ceiling soundproof. To be effective, you need to combine multiple strategies. Here are some common techniques that will remove the word from your basement.
Mass Loaded Vinyl
Bulk Loaded Vinyl (MLV) is a dense but malleable material. As a general rule, it is impregnated with small metal particles, which helps to increase the mass of the material. Mass plays an important role in soundproofing, as it helps to dampen sound waves, preventing their passage to another space. As such, MLV is an effective way to reduce structural and airborne noise.
You can install MLV on the walls and ceilings of your basement. To do this, be sure to measure the space where you are going to install it and cut the material to the correct size. Once the material is in place, fix it to the surface with nails, screws or tacks. Again, you can improve the soundproofing capabilities of the material by applying green glue to the surface before installing your MLV.
Bulk Loaded Vinyl is a product you can use anywhere. In this particular case, it can be useful in a number of ways. However, if you want to stick to shallow applications, tuck it under carpeting on the floor above the basement or attach it directly to the ceiling.
MLV is an incredibly dense yet flexible vinyl material that is sold in rolls. It doesn’t take long to flatten, so you can use it as a carpet backing on floors above the basement. Alternatively, if you’re ready to attach it to the ceiling from below without removing the existing drywall, you can nail or staple it. However, since the material is only available in black, you may not want to expose it. There are several ways to install it on the ceiling while still looking at it. For example, you can still build a suspended ceiling with flexible channels and drywall.
TMS Sound Proofing Padding for Wall
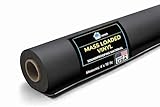
- High-Efficiency Sound sound barrier quiet wall with a proven 27 STC...
- Mass-loaded vinyl 1 lb sound proofing for wall, floors, and ceilings...
- Environmentally safe - Non-toxic and odorless, made of Virgin material...
Adding mass
Adding mass to your ceiling is an easy task. The purpose of adding mass is to thicken the surface of the ceiling. Dense surfaces do not vibrate. As a result, words do not easily pass through them. Adding mass includes pinning extra wood or installing more concrete material on the roof.
Mechanical isolation or decoupling
Mechanical isolation is the technique of introducing air between two objects that transmit sound. The strategy involves using double stud walls, elastic channels, sound clips and hanging studs.
Soundproof All Noise Appliances in the Basement Before It Reaches the Ceiling
The first thing to do before you think of soundproofing your ceiling is to remove all structural noise from your basement. The sound of vibration enters through the wall. Shock absorber pads for washer-dryers: anti-vibration, anti-slip, noise-reducing rubber pads for washing machine feet and dryer feet – pack of 4 universal anti-step pads with mini level
Use anti-vibration pads
Anti-vibration pads are the most effective way to reduce structural noise. It’s cheap and easy to install. These absorb all vibrations and prevent disturbances in other rooms.
The best part is that you don’t need any special skills to repair the electrodes. You can do this in less than 5 minutes. Order tampons on Amazon and place them under a washer or dryer.
You will reduce the noise by more than 30% depending on your device.
Shock absorber pads for washer-dryers: non-slip and noise reduction
PCMaker Isolation Pad – Soundproof Speaker isolation Riser – Anti-Vibration Pad
Place a dense mat or blanket under the noise device
Noise absorbing blankets are great for absorbing excess noise from vibrating devices. For this reason, buy a sound absorbing blanket and place it under your device.
When you cover your device, you do not need to cover it completely. To control device noise, use the following tips.
Place blankets on the floor.
Place the device in the middle of the blanket.
Stick the free cover on the side of the machine.
Most importantly, make sure you buy the right coverage.
A thick blanket or blankets work well. You can use any one. However, do not forget to clean and dry the blanket regularly. This will prevent bad odors from developing in your basement.
Seal the Ceiling Cracks
Each ceiling will eventually develop gaps or cracks. Basement ceilings are more vulnerable to this problem. Ceiling cracks become a problem because they allow sound and air to pass through them.
The seal cracks in the ceiling
Therefore, inspect your basement ceiling. Check for cracks. Sometimes you don’t see big cracks. It is important to be careful when inspecting your ceiling. Even small cracks will be needed. If they are not sealed, they will develop into large cracks. Also, small cracks allow air and sound to pass through.
For proper inspection, scrub the ceiling surface. Clean all dust and check for any cracks you have missed.
Fix them if they are huge after finding the crack. For small cracks, seal them with a gasket. The seal is available on Amazon.
Quickcrete Concrete Crack Seal Natural 1Q
It’s easy to use
It is very durable
The gasket kit comes with all the tools you need to seal the voids. It comes with a spatula, putty knife, sanding pad and primer. After using it on your ceiling, cracks will not be visible after painting.
Install Acoustic Insulation Between the Cavity Joints of Your Wooden Ceiling
If your basement ceiling is made of wood, you will not be able to seal cracks like drywall. Wooden ceilings are light weight and allow sound to pass through them easily. When someone walks upstairs to the basement, you can easily hear them. The sound in the basement can be heard in other places as well.
To reduce this noise, work on your cavity seals. Empty ceiling cavities reassemble and when the sound hits them cho actually widens the sound from the basement.
Therefore, add a soft perforated material in the antler. Insulating elements, including air pockets, can make all noise damp, come out, or enter the basement.
You can repair fiberglass insulation. This will reduce the amount of noise. However, soundproofing pads will reduce the noise compared to fiberglass.
Pin the Blankets to Your Ceiling
Attach the blanket to your roof. For maximum experience, pin a thick blanket. If you are controlling your upstairs room, spread a heavy mat on the floor. It will absorb lots of noise effects from the house.
Secure ceiling covers using nails. However, do not use thin nails. If you use thin nails, the covers can slide easily off the ceiling. Use a nail with a “big head” to help keep the blanket in place.
If you live in a rented house, you are limited in many ways. You can’t make any adjustments to the basement ceiling. Also, you can’t take on any big soundproofing projects. Therefore, with all these challenges, blankets become the perfect choice for eliminating all the noise in your home.
Your ceiling blanket
Most blankets can be used for soundproofing but not all will work.
Dense blankets reduce overhead noise and vibration. When you think of soundproofing, you should look for covers made from the following materials.
Corpus
Multilayer polyester
Mineral wool
The movable blanket is the best sound shovel. These are designed to protect furniture and equipment from damage in transit
Moving blankets are suitable for soundproofing because they are dense. They dampen sound vibrations easily. To learn more about soundproofing rooms with blankets, check out this article.
Add Another Layer of Dry Wall with Soundproofing Glue
The denser the hard surface, the less noise penetration will occur. Therefore, add one more layer of driver to your ceiling. Double the thickness of the ceiling. Before attaching the drywall, apply green glue to the ceiling. Green glue is an acoustic compound that will hold the excess drywall together. The adhesive is designed for other soundproofing projects. It is commonly used as a sealant.
Apply to your roof, corners. Add another adhesive to the sound absorbing compounds or drywall. Even a thin coat of green glue will work fine with regular drywall. Doubling the thickness of your ceiling will reduce the vibration of the ceiling. The sound will fade before disturbing the other rooms. Removes air between the two drywalls using sound absorbing glue. Once the green glue dries, it cushions and absorbs all the sound that goes through them. Words go through them so it’s hard.
Add soundproofing glue
Install Acoustical Tiles and Drop ceiling
Suspended ceilings are also called suspended ceilings. The technique doesn’t make your basement look attractive but it works well in removing the sound.Start by filling in the holes in the ceiling. Protect acoustic tiles in a suspended manner. Acoustic tiles are a porous material that dies by trapping sound in its voids. After fixing the tiles, insulate them with a fiberglass backing.
Install Acoustic Foam Mats on the Ceiling
Foam mats act as insulators. No construction is required when using these. The mats contain foam rubber and are water, oil and petrol resistant. They do not allow air or sound to pass.
Unlike blankets, foams do not absorb moisture and do not emit odors. They are easy to glue and stick to the wall.
Acoustic foam panels are specifically designed for music rooms. They can work well on basement walls. Acoustic foam panels absorb any sound of shaking outside the wall. They soften all the echoes produced by your basement. Ascetic foam is very useful to reduce the noise of the bus alloy.
We have tried and tested the following acoustic foams. They work great on the ceiling in our basement.
How to Soundproof Basement Walls
Basement wall soundproofing is almost identical to ceiling soundproofing. You can pin up blankets, hang soundproof curtains, install acoustic foam, and repair any cracks in the wall.
How to Soundproof Basement Floor
The methods used to soundproof the ceilings and walls cannot be applied to the floor in practice. You cannot install drywall on the floor. But below the basement is the earth which is a very good insulator. The only problem is the concrete floor. Concrete is a good conductor of sound. So you need to dampen the concrete floor. Heavy rubber materials like acoustic mats are popular but expensive choices. Cork underlay is a cheap alternative that will give you decent results. Discover my recommended floor underlayment product for soundproofing floors.
How to Soundproof Basement Windows
Soundproof windows are not only difficult but also expensive. However, you can choose a window socket which is a cheaper option and it is used by many home theater owners. I have an article on this site that describes in detail how to create a window plugin.
How to Soundproof Basement Doors
You can have a house without windows but you can’t move the door. All your efforts to make the ceilings and walls soundproof will be in vain if you do nothing for the doors. Make the door as heavy as possible. The best solution is a connecting door. Alternatively, to reduce costs, you can go with a solid core door, but not too hard even a solid main door. This door will require some investment and it cannot be ignored.
Frequently Asked Questions
What are the benefits of soundproofing my basement?
Soundproofing your basement can significantly enhance the overall comfort of your living space by reducing noise transmission. It creates a quieter environment, perfect for a home theater, music studio, or simply to escape everyday noises.
How do I identify sound leakage points in my basement?
Conduct a thorough inspection for gaps, cracks, and openings in walls, floors, and ceilings. Check for areas where sound can easily pass through. Common culprits include windows, doors, and utility penetrations.
What materials are effective for basement soundproofing?
High-density materials like acoustic foam, mass-loaded vinyl, and fiberglass insulation are excellent choices. These materials absorb and block sound, creating a more insulated space.
Can I soundproof existing walls in my basement?
Yes, you can enhance existing walls with techniques such as adding extra drywall layers, using acoustic panels, or applying mass-loaded vinyl. These methods improve sound insulation without major renovations.
Are there DIY soundproofing solutions for a basement?
Absolutely! DIY options include weather-stripping doors and windows, using rugs or carpets to dampen sound, and adding heavy curtains. Simple fixes can make a noticeable difference in reducing noise.